Creating a basic version of the Sugarscape simulation
This tutorial will show you how to create an initial version of the sugarscape simulation to help understand the ABStractme tool features.
First create a new project and a new diagram, detailed instructions on the link: Creating the first project.
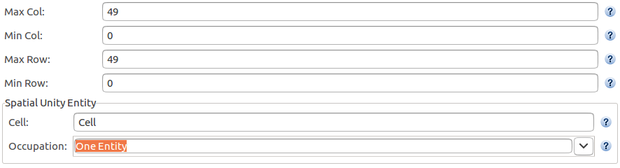
Open the diagram created, click on the overview box. At the properties view, select the "Spatial Abstraction" tab and change the fields "Max Col" and "Max Row" to 49. The grid will change to 50 x 50.
We must not allow two or more agents to occupy the same space in the case of this simulation.
To change this, in the same view, on the "Spatial Unit Entity" rectangle, "Occupation" field, select "One Entity".
The resulting properties view will look like Fig. 1.
Now select the concern line on the palette and click on the overview rectangle.
A concern will be added to the overview along with its corresponding tab. Select the concern tab that appeared after the creation of the concern, a new window will appear with the concern diagram.
Now we must add an agent to the concern. Select an agent to add, by clicking on the agent line on the palette and clicking anywhere on the concern diagram.
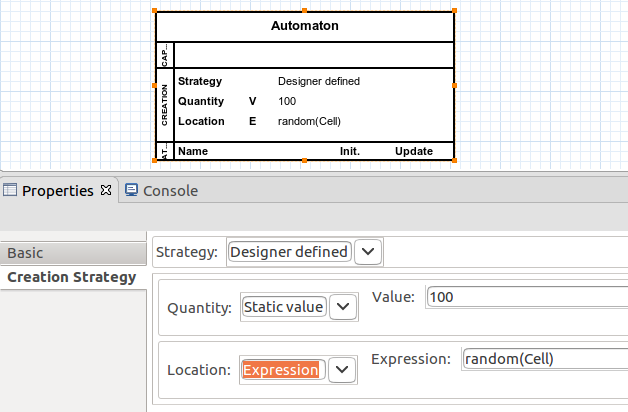
The agent box will appear on the diagram. Select the box. On the "Basic" properties view, you can name the agent, in our case, its name will be "Automaton".
Change to the "Creation Strategy" tab, change the field "Strategy" to "Designer Defined".
The simulation will start with 100 agents, on the line that begins with "Quantity", set the "Value" field to 100. The resulting agent will look like Fig. 2.
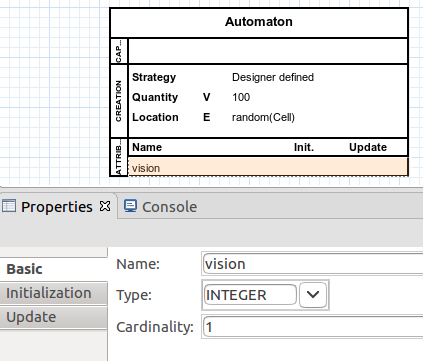
Now we need to add an attribute to represent the agent's field of vision. Select an attribute to add, by clicking on the attribute line on the palette and clicking on the agent box.
You can select the attribute created. On the "Basic" properties view that appeared, change the attribute name to "vision", and its type to "INTEGER".
The resulting attribute will look like Fig. 3.
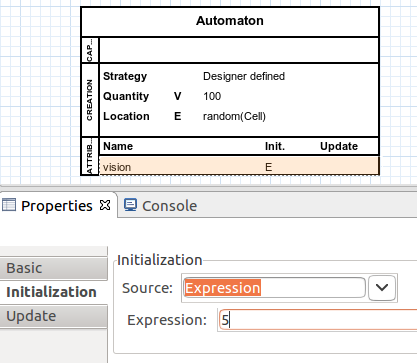
Change to the "Initialization" tab. On the field "Source" select "Expression". Set the field "Expression" that appeared to 5. The resulting "Initialization" tab will look like Fig. 4.
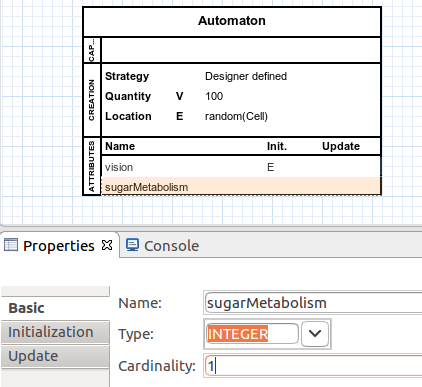
Now we need to add another attribute to represent the agent's metabolism. Follow the same steps as before, but the name of the attribute will be "sugarMetabolism".
The resulting attribute will look like Fig. 5.
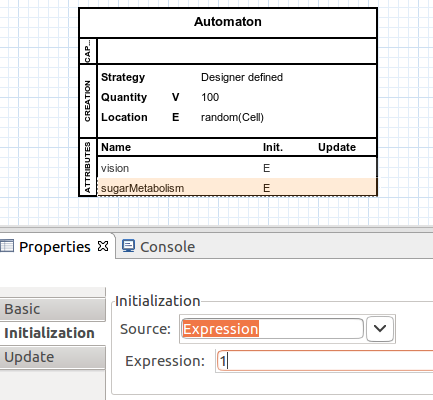
Change to the "Initialization" tab. On the field "Source" select "Expression". Set the field "Expression" that appeared to 1.
The resulting "Initialization" tab will look like Fig. 6.
Now we must add the capability of movement to the agents.
Select an mobility to add, by clicking on the Mobility > "Random Walk" line on the palette and clicking on the agent box.
A new box will be added to the diagram, notice that it is connected to the agent.
The resulting box will look like Fig. 7.

We must allow the agents to move to the limits of their field of vision at each step of the simulation.
To do this, on the properties view that appeared, "Range" rectangle, check the "Limited" dot and on the "Upper" field select the "vision" attribute previously created.
The resulting properties view will look like Fig. 8.

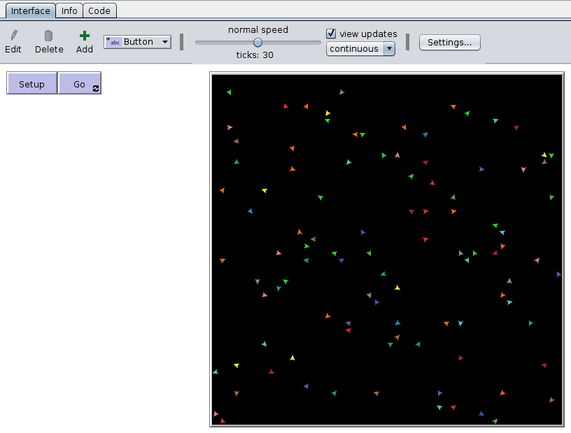
Now we can export and run the simulation on NetLogo, detailed instructions on the link: Exporting the Project to NetLogo.
The simulation will look like Fig. 9.
The complete project created on this tutorial is available to download on the link below.
Notice that the metabolism attribute was not used, it will be used on the second part of this tutorial, which will include the creation of the sugar to be harvested by the agents: Adding energy to the agents.